Saturday 24 July 2010

Beautiful beads, found on Etsy!

The second of my posts on recent wonderful finds on Etsy and Folksy.

I mentioned in my last post about re-considering the type of jewellery I make and since I've always found pieces incorporating semi-precious stones sell well I have just treated my self to a whole load of them from Michelle at DoubleDDesign on Etsy: http://www.etsy.com/shop/doubleddesign

I blogged about her a while back as she is having a sale to help her doggie who was attacked by "persons" sadly still unknown http://lindentreedesigns.blogspot.com/2010/06/please-help-this-etys-seller-raise.html

Here's my order in all it's riotous glory (minus some beads I'd already used at the time of photographing):


And here's a closer look at the stunning green and turquoise dyed magnesite. I've used dyed howlite before but not dyed magnesite and have to say I'm extremely impressed by the quality of these beads. (I'm also not sure if howlite and magnesite are "related" at all, my attempts to Google this have brought up conflicting results.) And there was an extra bonus here as Michelle had the green beads on offer due to there being four that were coin shaped in stead of oval. They're ever so slightly darker than the rest and are going to make a perfect couple of pairs of earrings!

Just look at these! Clockwise from top left... The end of the aforesaid strand of green dyed magnesite - yes it really is that stunning colour. Some lovely nephrite jade ovals. Some amber chips - I've never used amber before, I think I could become addicted, the colour and warm feel of these is superb. Some really great quality silver plated crimps - best I've found in a very long time. Some pretty little cherry quartz rondelles - these are a great find as I have been hoarding some cherry quartz hearts for ages and now I have something to put them with. And, last but not least, a mouthwateringly lovely leopardskin jasper pendant. I've recently bought some more Sterling silver wire so am planning some wire wrapping fun with this one.

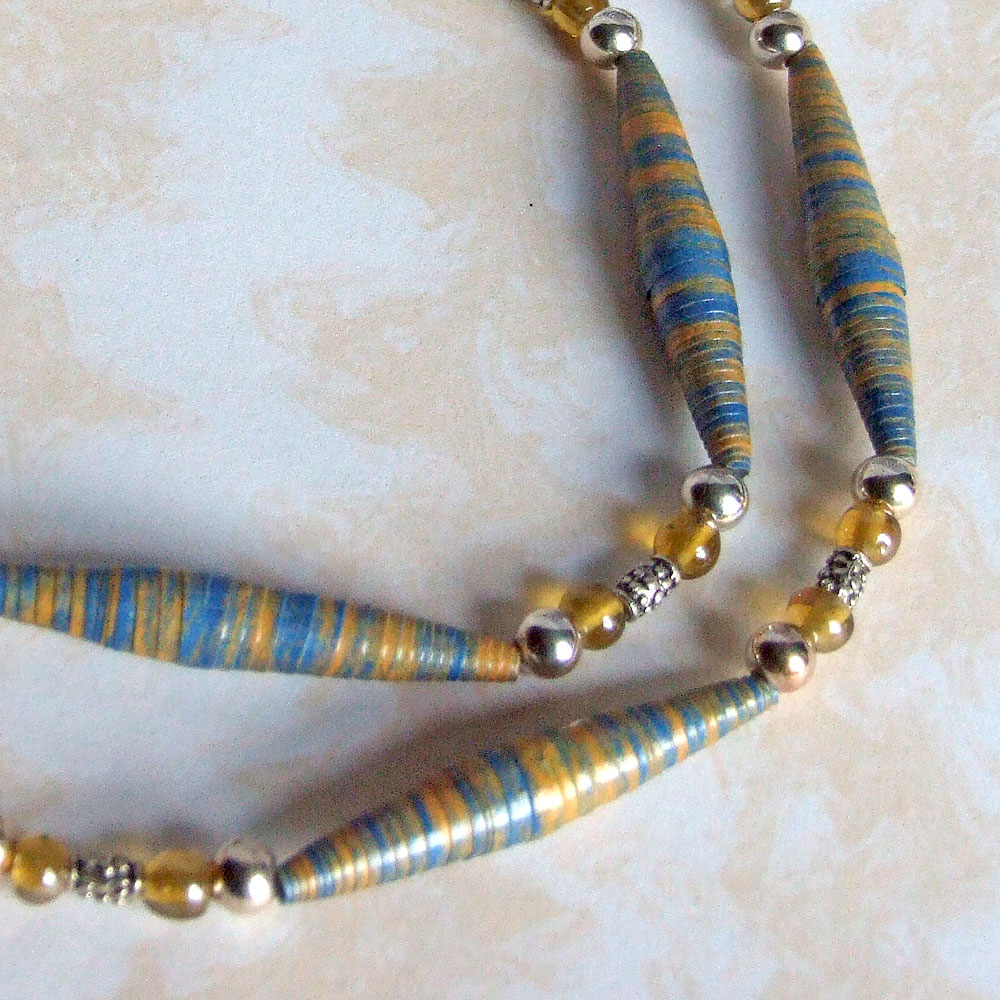
I said I'd already used some of the beads and here's my first creation with them! I'm especially pleased with how the unakite beads from my stash team up with the nephrite jade and the amber, it's as though they were made for each other.


Michelle has some fantastic bargains in her shop and everything I've bought from her is superb quality. She's a great person to work with and is on my Etsy favourites as I'm sure I'll be buying from her again very soon!

Lovely lucite, found on Folksy!

This is the first of a series of posts about all the lovely things I've been buying on Etsy and Folksy recently. The first two of these posts are going to be about some stunning beading supplies I've found - I'm a self confessed supplies junkie who loves nothing more than to browse for new items to add to my stash!

I've been thinking a lot lately about the kind of jewellery I'm making and it's potential audience and have come to the conclusion that I need to try some new things. While I love beadweaving, the market for my more complex pieces (the ones I like best to do) it is fairly limited due to their expense. So while browsing the Folksy forums recently I experienced nothing short of an epiphany when I spotted a post from Liz Dyson of The Little Bead Box, enquiring about forum members' preferences for combining packs of lucite flowers. She had just taken delivery of 5400 of them!!
http://www.folksy.com/shops/lizdyson

I was seduced straight away by the stunning array of colours - here is part of my order, sorted by size and colour, ready to put away in its new home.


Just look at those mouth watering colours!

New home - as you can see, the sun was over the yardarm at the time of photographing! The only problem with these drawers as they are is that I have to carry them around strictly upright to stop everything spilling out and have to store them where Stanzi can't get at them and knock them over with a paw-swipe. I think the ultimate solution will be to screw them down somewhere, which will happen when we have the back workroom sorted out. I'm only using them because I've run out of box space but I am liking the way the flowers look in them!

Some experiments in layering these little lovelies and there are so many possibilities yet to explore. Only thing is, I can feel the need for more shapes creeping up on me...


My first actual earrings; I've decided to keep the orangey ones. My excuse? The fire polish faceted beads I've used in them are the last of a lot and the colours aren't quite matching. (I don't need much of an excuse...in fact I'm wearing them as I type!)


Liz has a fantastic array of beading supplies in her shop and is a lovely person to work with; she's on my Folksy faves now and I'm sure I'll be visiting her again very soon!

Sunday 11 July 2010

A day out in Fairyland.


We decided this afternoon to take our new motor for a spin and ended up at Cannon Hall near Barnsley, seat of the Spencer Stanhope family. It's always been one of our favourite haunts and we hadn't been for quite a while so it was the logical choice.

In winter we usually while away a couple of hours in the house admiring the collections, especially the Moorcroft pottery and the paintings, but this afternoon the house just got a cursory glance as the warm sunshine beckoned us into the pleasure grounds.

We headed first for the little area surrounding a carp filled pond known as Fairyland, which was designed and laid out by Sir Walter Spencer Stanhope, a British conservative politician, and Cecily Winifred, one of his daughters.


He cleverly incorporated a number of architectural features salvaged from nearby churches. The last time we visited these were very overgrown but in the last couple of years they've been thoroughly cleared and restored.


Here you can see the amazing water lilies; I don't remember them ever being so profuse but maybe that's just down to how long it is since we've been here!


These carp were simply enormous! And they were getting a lot of attention; there were quite a few children there who were clearly fascinated by them, all looking and pointing excitedly.


We moved on to the walled garden, another favourite spot that always has some really beautiful roses in summer. Neither of us are rose enthusiasts so I've no idea what variety this one is but the colours are vibrant indeed. Not overly fragrant, but beautiful nonetheless.


Now for the kitchen garden and here are sweet peas, one of my favourite cottage garden flowers. Wish I could manage to grow them like this without them becoming straggly! Again I don't know what variety this is; it's a shame there was no label as I'd have taken a note so I could look for some seeds.


Still in the kitchen garden, one of the several espalier trained varieties of old pears.


And finally, a pretty pink flower that we couldn't immediately identify, growing in profusion in the "ha-ha", a deep walled ditch whose purpose was originally to separate the livestock from the pleasure gardens. Will have to consult one of the four or five wild flower identification guides we have somehow managed to accumulate!

Wednesday 7 July 2010

Paper beads - a bit more about the process.


Since I'm now feeling better - hurray!!! - I thought I'd post a bit about my process in making paper beads.

I started out by experimenting with old magazine pages but decided I wanted more control over the colours in the end result so began to design my own patterns. I was initially a bit reluctant to do this since one of the plus features of many paper beads is that they are up-cycled but I'm afraid I just couldn't get on with the colours my magazine pages were producing.

I design the patterns in Photoshop. I start by using the "Paint Bucket Tool" to create an overall colour, might be a pastel shade, might be something brighter. Here I've used a pale green.


Then I go Brush Tools and select one that appeals to me - the one I've used here is called Crosshatch 3 but to me it looks for all the world like a waffle! I pick a contrasting colour for this tool and then get to work with a pattern.


I tend towards stripes as when cut and rolled I invariably find the end results aesthetically pleasing but I do sometimes go for more random patterns. I generally use the brush freehand and a bit wiggly as I have done here, though sometimes I've used the Select tool to pick out rectangular stripes to drop colours into.

Next, I start to have fun with filters! This one is Brush - Crosshatch (again) and I've tweaked the stroke length, sharpness and strength.


Then I have even more fun! Here I've tweaked all three scales in Colour Balance and added another filter - Sketch - Chalk and Charcoal.


I do "Save As" at each stage of the process so I can return to any of them and take them in a different direction. Memo to self - I really, seriously, need to organise my filing system soon or else the whole thing is going to go into meltdown!

Once I've printed out my design I turn the paper over and print out a grid of long interlocking triangles that Roger created in Publisher (which I can't get to load here!) on the back - I've learned from bitter experience that freehand guillotining results in rubbish results and a very bad tempered me.

Rolling the beads is pretty straightforward, I use cocktail sticks and keep a nice steady rhythm. The first few I made, I used far too much glue and got in a nasty sticky mess. Now I only spread glue on the final couple of inches before rolling up!

The last bit's the most time consuming - varnishing. I keep them on their cocktail sticks and secure them in a piece of scrap polystyrene then apply three coats of polyeurethane varnish. Takes days but it's worth it. The end result is water-resistant though not waterproof. I've been wearing a necklace incorporating some of the first ones I made for three months now (not all the time, obviously, but pretty frequently) and the beads are holding up really well. I'm a fairly heavy user of moisturiser and perfume and neither seem to have affected them so far.

The worked example above is a rather boring colour as it's one I just created quickly for this post (I can't remember the individual steps I've been through with all the ones I've already done, the ravages of encroaching age and all...) So here are a couple somewhat more colourful examples from my extensive files: